Showing posts with label デザイン. Show all posts

Friday, 22 September 2017

Top Ten Top Tens

I've already posted my own top ten tips for building a passivhouse and posted about Alessandro
Merigo's but I've now added eight more to give you a top ten of top tens. Please note that most of these will just appear on one internet page, and none of these are click-bait with a button for the next page hidden between several traps.

1. Here are my ten tips for building a house.

2. Alesandro Merigo's ideas are here:

3. Dieter Ram has ten principles for good design, which apply when designing anything.

4. Interestingengineering.com has an engineering perspective, which is close to my own ideas in
Ten Amazing Tips for Building Energy Efficient Homes.​

5. Think architect has Design-based ideas for building affordably.

6. Finder.com.au have the top 10 most helpful tips for building a house.​

7. NZI Architects expose 10 myths about architects.

8. Freshome.com has ten mistakes to avoid when building a new home, although I'm not sure about their advice to have as many windows as possible, and to think about skylights. I'm beginning to wonder whether I should have stuck at seven.

9.  LotNetwork.com has Ten green home building ideas, although they don't talk about the importance of insulation. Green may be more of a colour than a practical strategy to save the planet.​

10. And just in case​ you now need them​, here are ten tips on anger management from Mayo Clinic.

Friday, 14 April 2017

Sweeping generalisations about cultural differences in lighting


A lot of western developments in light fitting design have been going on in Halogens. Compact, low voltage LEDs can now slip neatly into some Halogen fittings. Halogen bulbs are smaller and of lower voltage, but not much more efficient than incandescents. They have never really taken off in Japan, and especially not in domestic application, where more efficient fluorescents have been standard since the 1970s. Many foreigners have been taken aback when they first visit a Japanese house and see the kind of lights that would only appear in shops and offices in the west.

There is an interesting article here on i news about new lighting technology.

I've been keenly watching the development of LEDs for domestic lighting over the last few years, but most of what I have seen is the production of LEDs in conventional light bulb packages. 

Early in the development of incandescent lighting, a conscious decision was made to limit the lifetime of the light bulbs, in order that new bulbs could be sold. Hence the invention of lightbulb fittings, and replaceable lightbulbs. In many cases for LED lights, the life expectancy is as long as the building, or at least as long as the furnishings, so there is no need for a replaceable LED. 

To have a replaceable LED light bulb would be like using a typewriter keyboard for a computer. This would be ridiculous because the QWERTY typewriter keyboard layout was designed to slow down the typist and stop mechanical keys jamming. Wait a minute, we do use typewriter keyboards for computers!

Moral of the story: packaging is of much higher priority than performance. 

Wednesday, 21 May 2014

The best LED I've ever bought

With its bright light, spidery legs, magnet and sensor, the Ritex Dokodemo portable LED light is probably the best LED I've ever bought. And I've bought quite a few LED lights over the past few years. A lot of them have been completely rubbish. 

I got a battery powered device with three LEDs spaced a few centimetres apart in a row and a magnet on the back that would fit onto the front of the fridge. 

The magnet worked.

Unless you tried to use it to hold something else onto the fridge.

And there was an E17 light that looked pretty promising to replace the incandescent bulb in a table lamp. It had several LEDs in reflective holes that would point light where you wanted it. But it was made of cheap plastic, incapable of conducting the amount of heat away from the LEDs that they would have produced if they'd put out a decent amount of light. 

They did not. Somebody in the design department had not considered that. 

The best lights I'd got so far were bedside lights with single high-power LEDs. Nice heavy bases and plenty of luminous power. 

I saw the Ritex docodemo in a hardware shop and decided it would work well under the stairs. 

Instead of wiring in a light there, from the start the plan was to plug a sensor light into a socket high up on the wall in there. Plug-in sensor lights have been around for a while, and recently they have been LEDs. But they don't put out a lot of light. They are probably OK in a corridor or on stairs so you can see where you're going, but if you're in a store room trying to find something they don't really do their job. 

The Ritex has been keeping it light under the stairs when necessary. It is battery powered and the batteries ran out once, but that was when someone had left it switched on, rather than on sensor mode, since the previous day, and it was starting to dim.

I took it camping with us last weekend, and realised there what a great light it was. 

It was in the area of camping that LEDs made their first big commercial success in delivering light rather than just vaguely letting you know that light was there, as they had been doing since the 1970s when they appeared on electronic panels and then in the seminal digital watch that would come on for a few seconds to show you the time in red. LED head-torches have been around for a while, where their reliability, long life, low power and light weight make any extra cost worth paying. 

We've got a decent collection of LED head torches, but have still been adding unideal candidates to our gallery of camp lights. 

Before it got dark, I lined three of them up along the rope above the table that was going to hold up the tarp covering it. One of the lights gets about seven out of ten on my scale of satisfaction. It's a small puck light with a hook on the back, three AAAs inside and not a bad amount of light, although it seems to take a little while to warm up. It works well hanging from the middle of a tent, and is better than nothing above a table, although it doesn't really give out enough. 

Next to it I put our wind-up LED tilley lamp. This gets about six out of ten. The good point with it is the handle on top so you can charge it when it starts getting dim. It can also be charged from the mains or from a car. The big problem is that it's trying to be a tilley lamp, so instead of sending the light down, where you need it, it sends it around in all directions, which may be useful if you're pretending to be a lighthouse, but is not much use otherwise. And if you were going to be a lighthouse you wouldn't be that bright. 

Next to these I hung the Ritex, and when I turned it on, the other two immediately became parodies of themselves. The puck light is smaller and we'll probably bring it with us, but I think the LED tilley lamp will be staying at home for our next trip. One issue with camping lights is that you don't want things to be too bright when you're camping. Being under the stars is great, but you have to be able to see them. Since this is a sensor light, it will go off if nobody moves for a while, so when you're sitting back you can enjoy the night, but when you need to see what you're doing it will help you out. 

So under the stairs it works perfectly. On the campsite it works perfectly. I haven't had cause to try it out in the event of a power cut, or use it for illumination when I'm working outside at night, but I'm confident it will perform wonderfully in these situations too. 

It's so good, in fact, that I'm going to get another one, or perhaps two. The only problem is that they now offer an updated version, on which you can adjust the colours, and I have to decide whether that's worth the extra 500 yen. I think it probably is. 


Tuesday, 18 February 2014

Snow architecture

The Winter Olympics were held in Nagano sixteen years ago. With less than a month to go, there wasn't enough snow, and there were worries about events needing to be cancelled. Some of the organising committee went to a local shrine and prayed for snow. The gods answered their prayers and on 15th January it snowed. And snowed and snowed. Although Matsumoto wasn't holding any of the events, it was affected by this divine intervention, with a snowfall of 69 cm, the biggest since records began. This was hailed as one of those once-a-century snow falls, although 1946 seems to have been a bit snowy too. 

Last week it snowed 49 cm. Another one of those once-a-century snowfalls, then on Valentines day and into the next day it snowed 75 cm, so these once-a-century events seem to be getting a bit more frequent. Climatologist James Hansen, formerly of NASA claims that global warming means once-a-millennium weather events will happen once a century, and once-a-century events every decade, and decadal events every year. Read how warm was this summer here.

Anyway, one big impact locally is that there is a metre of snow on the ground. My obvious reaction is one of joy. People pay money to go on holiday for this kind of stuff, and there it is, right outside my window! Everyone else is muttering and grumbling about having to clear it, which is a civic duty here, since there are no municipal snow-clearing facilities. It's the height of shame in the neighbourhood if you're not out there shovelling snow the moment there's more than a few centimetres. 

As well as the mechanical implications of this, and the dangers of injury from shovelling too much or too quickly, I realised the worst thing for your health could be to not enjoy shovelling snow. So rather than digging from the road and the drive into a big pile against the neighbour's wall, and increasingly falling over the neighbour's wall, I decided to roll some of the snow up into giant snowballs and start making an igloo. At the beginning I was making an igloo while  clearing snow, but pretty soon I was clearing snow as a consequence of my igloo building project.

I've tried making igloos before, but never been successful. I've managed to dig a hole into a large pile of snow, but that doesn't really count, and usually doesn't get very big. I've managed to make a ring of big snowballs before and started contemplating the roof, but usually the snow needing clearing has run out, and the problem of making the roof has been too great. 

An igloo is a dome. An arch rotated into three dimensions. As such, it's a very strong structure. The weight of each part is transferred laterally, and I've heard that the bigger arches get, the stronger they get. The problem is that they only have this great strength when they are complete. Until the top-stone is in place, an arch is just two bent walls that are likely to fall over. 

So it was easy enough to make the bottom of the wall, and another layer of snow balls on top of that slightly further in. Then I started to worry. The form was fine but the process perplexing. My respect for those ancient arctic architects grew.

After a while I realised that I could keep building the structure upwards with smaller arches, not going through the middle of the dome, but from adjacent snowballs, then further apart. 

I also got better at making snowballs. In fact they were more like snow-bricks, from forcing my snow-shovel in, and packing the snow onto it. Better still were those cut out of trampled snow with a spade.

A big snowball made the lintel over the doorway, and then it was easy to fill the hole at the top. Next I used the same principle to build an arched entrance, just like they have on real igloos.

So this first igloo has taken me 46 years to build, but the next one should be a bit quicker!

See how the experts do it

Tuesday, 11 February 2014

You need a creel

Some friends of ours are planning a house. They have a long list of requirements, which is a very good idea. One of them is a hoist, or dumb waiter, for getting laundry upstairs. The problem is they want the washing machine downstairs, but to hang the washing upstairs. I suggested they get a creel. Not sure how to say that in Japanese, so I googled a picture. 

At first it came up with lobster pots and some town in Mexico, so I modified the search to add "laundry", and found this. 

The first picture was from a website of a company in my hometown. The next picture was from the town next door. I have seen one of these in a house in Japan, but it was the home of a lass from West Yorkshire.

I'm not sure if that's where the technology is from, but I think the name creel is Northern. Apparently in Scotland they're called pulleys

We had one in our sun lounge and always used to call it a creel. Apparently they are making a comeback as people try to cut their electricity bills by using tumble dryers. At least that's what the website selling them said.

Friday, 10 January 2014

Five laws of domestic science

1. All horizontal surfaces will accumulate crap

This is just the law of gravity really. This includes tables, chairs, shelves, kitchen counters, and floors. Tatami rooms are especially susceptible. If you're building a house and want a tatami room, and think it's going to look like the kind you walk into in a ryokan, then be aware that it's probably going to look more like a store room. 

2. The tupperware never fits into the tupperware cupboard

In our case it's a drawer. Tupperware is an amazing invention, but relatively recent in the psyche of the kitchen designer. It's cheap and light, which makes it ideal to buy and use, but makes it seem less voluminous than it is. When kitchens are planned, we think of cutlery drawers, places for plates and pans, cupboards for cups, and stockers for food. We are preoccupied with ergonomic locations for the fridge, cooker and sink, or at least we should be. Tupperware is the last thing on our minds. It will find itself in a left-over cupboard. Luckily tupperware is light, so it's not a big problem if it finds itself in a high cupboard.

There are two more more facts about tupperware. First, some of it is always being used, so whenever you try to neatly arrange it in its cupboard or drawer, which is already too small to start with, you're always missing something. Second, inspite of the trademark, and with apologies to other brands that are not getting free advertising, it is made by different companies and does come in different shapes and sizes. Some pieces and sets stack neatly together, smaller sizes fitting elegantly into larger sizes. Some do not. Tupperware collections grow organically and are not planned. It is always the large, bastard sizes that are hiding when the cupboard is organised, and it is those pieces that shatter the order into chaos.

3. It's easier to put things in front of drawers and cupboards than inside them

Sooner or later something is going to appear in front of each drawer and cupboard, unless the drawer or cupboard is in a well trodden, narrow corridor where people would trip over it. In fact, even then things get left in front of cupboards or drawers, and people do trip over them. Then usually the person who left the thing in front of the drawer or cupboard complains about the person who kicked their stuff. One solution to this is sliding cupboard doors. These can still be opened with stuff in front of them, so there is much less need for people to put stuff there. Also, people may be scared of leaving things in front as they know the door could still be opened and their stuff could fall perilously into the void beyond.

4. There's always a pile of stuff that doesn't live anywhere

A plastic part that definitely belongs to something. A semi-precious stone. A ticket for an event in two-and-a-half weeks. A glove that somebody left in the house. It's been there for ages, and the person has been surviving with one glove. Who knows, they may even have taken up golf.
Coming soon: a list of objects with no obvious place to put them away.

5. The only way to avoid clutter is to have no stuff.

Tuesday, 26 November 2013

Three things we didn't mention

There were three things we didn't mention when they came around for the one-year-and-four-months inspection. It should have been the one-year inspection, but it was a little late. We did mention several issues, and one was addressed quickly, when the electrician came shortly afterwards and quickly switched the sensor light in the pantry, then drilled a hole in the cover for the light in the under-floor storage so we can use that. Most of the other issues took a couple of months, and we're still waiting for others.

One of the things we didn't mention was the lights above the kitchen sink. They shine down in a perfect direction, but unfortunately the sink below them is about 20 cm too far forward, so the front of our kitchen top is not adequately illuminated. At the time, we had to put the lights in that position to fit the shelves in the cupboards above the sink, which cleverly can be pulled down and allow the space to be used. I suppose it's possible we could do something about their angle. It would be quite easy to fit a lens, if we had one.

Another thing we didn't mention was the trip-wire functionality of anything plugged into the power sockets at the top of our staircases. This is a design issue that we can't do a lot about now.

The other thing is the width of the wardrobes. This is another design issue, and it would also cause some upheaval to fix it now. Wardrobes need to be an adequate width to ward the robes inside them, so that the doors will shut properly and not hit the jackets and shirts hanging on their hangers, even if the doors slide rather than open outwards. I think the problem is that the architect was doing his usual calculation from the centre of the pillars in the wall to the centre of the pillars of the wardrobe door frames, forgetting that there is an extra 60 mm of insulation on the inside of our walls. I worry that the solution to this design problem may have been to remove the insulation.

This problem manifests itself most in broken buttons on the cuffs of my jackets. The first time this happened, it seemed like one of those bits of wear and tear that just seems to happen to things. When a bit of broken button dropped off another suit, it struck me as a little strange. Then when I saw the button that had been replaced on the first sleeve broken again, I realised there was some systematic problem here. It can take over a year to realise some of these problems.

Friday, 12 July 2013

A New Tradition of Futon Sofa Bed

The futon sofa bed is now working, and here are some reflections on the design. I can make some modifications and address some of the issues, but really I'd really like to make another one. To justify this I'd need to buy another futon, of course. 

The front should probably be higher. I kept the angle to about 7 degrees, so the base is around 20 cm off the ground at the front. This height is great for kids, or at least would be if their upper legs were longer, since the chair part is quite long. They seem to sit on it quite happily, when it's not being used to accumulate crap.

Another issue is that the back is vertical, and the frame at the back of the chair is a right-angled triangle. When you sit back, this rocks a little and I think an isosceles triangle, more like an A-frame, would be more stable. As it is there is a chance of it banging back into the wall behind. 

So geometrically speaking, I probably should have made the back a little taller and at more of an angle, the front a little higher, and the seat and middle seat-back sections a little shorter. 

As I predicted, it is possible for a small child to open the sofa into a futon, but after pulling it out half way, it crashes down with a large amount of noise and power, and the health-and-safety part of me is worried about other children's fingers or toes getting in there. So some kind of damping would be a good idea. It may be possible to get more sophisticated hinges, but these are likely to work in the wrong way. I'd like something that will provide more resistance the faster it moves, but simple damping on the hinges is likely to be the opposite and resistance will decrease as it gets faster. 

Also as predicted, putting the futon back into sofa position requires two hands, or a long arm, as the middle part needs lifting a little before it is pushed in.

It may be possible to work out a strap and pulley system that would both control the descent of the A-frame, and facilitate its return, but I think that's going to take at least another month, 12 envelope backs and ten sides of A4.

Also the spacing of the horizontal slats is a bit wide, and I think I need to increase it by three or six. There are four fixed slats, at the end of each of the movable parts, so they can only be increased in multiples of three. Currently there are 13 90 mm slats, with gaps of around 80 mm between each, which are big enough for little feet to push into when they are walking along the futon on top. Another three slats will bring the gaps down to about 45 mm, which should be small enough. Six extra slats will give a gap of just 25 mm, which may not be big enough to allow it to fold up properly.

Spruce, the material I used, seems quite stiff and pine may have been more springy. 

Since I last looked, another kids' futon seems to have found its way between the frame and the futon on top, which has made the seat a little more comfortable. It has also created a home for another piece of loose soft furnishing that was floating around the house, which was the main job of the device. Perhaps it can attract even more bits of soft furnishing, and solve the height and leg-length problems too!

Saturday, 22 June 2013

Plans for a Traditional Futon Sofa Bed

Here's the design. Sorry it's not in CAD! That's one technology I've never really got into. Also, I haven't drawn all 13 planks that go across, but I think you can get the idea. And sorry that I wrote on it while I was working out what lengths of wood to get.

The problem with a lot of the commercially available futon sofa beds is that they don't seem to realise that the sofa is likely to have its back to the wall, and when you turn it into a bed, you just want to pull it away from the wall into the space in the middle of the room, and not have to faff around moving the base in and out. This is not so difficult, but maybe I've just thought about this more than everyone else!

Even if the sofa does not have its back to the wall, the chances are that there will be a space in front of it which could be turned into a space to sleep. If not, then they don't really want a sofa bed, they want a futon cupboard. Perhaps a traditional Japanese futon cupboard. These come free with every traditional Japanese house. 

Also, in terms of design criteria, it's going to be in the children's room, so I want something that a seven-year-old can turn into a bed, but that won't collapse if a ten-year-old and two of his mates are jumping on it. This is more of a challenge, but I think doable!

There are wheels on the floor-ward end of the seat. When the seat is lifted up, these should make contact with the ground, making it very easy to pull the seat forward, turning the A frame into a flat bed. It will be very difficult to do this when someone is sitting on the sofa, since the wheels are going to be pushed away from the ground by their weight, so I hope the wheels will only come into action when they are needed for conversion. 

I'm hoping the weight of the frame, and the angle of the middle section as it meets the ground, will keep the back robust. If not, a latch can easily be retrofitted to lock the frame in the sofa position. 

Putting the bed back into sofa position may be a two-handed job. Although the wheels are going to go back quite happily, the other part of the bed may need lifting up a little before it starts moving. We'll have to see how it works when it is made!

The materials I've used, by the way, are 2 by 4 (89 x 38mm) spruce for the frame with 89 x 15mm planks on top.

Monday, 17 June 2013

Designing a Traditional Futon Sofa Bed

We have a double futon that we don't usually use and it's kind of tricky to find somewhere to put away. So at the moment it's folded into three and sitting in the kids room doing a rather poor impression of a couch. It's doing a very good job collecting toys and dust, since it's directly on the floor, and is creeping, gracelessly and lopsidedly, away from the wall.

What we really need is a base for it that will convert from a couch into a bed. So I'm in Japan, and you'd think that it would be really easy to get one. This is the land of futons, right? Everyone must have one. 

Well, actually... 

Traditional Japanese futons go on tatami mats. These are traditional Japanese floors. If Japanese people get rid of the tatami mats or build houses with wooden floorboards or carpets, as they increasingly do, they get beds. If they want to sit on something other than the floor, they get sofas and couches. 

There is no such thing as a traditional futon sofa bed. Futons, sofas and beds are from different traditions. 

So, to the drawing board and then to the shop to get some wood. As usual, I start the design process with bits of paper and crazy ideas, then, a few sheets later, I start looking on the internet to see what there is and how they make it, and find nothing ideal but many things inspirational. Then, several sheets later, the ideas become more detailed, and the designs become more simple as solutions to problems take away the causes of the problems.

Like the legs, for example. The problem with having the futon on the floor is that you can't sweep under them. So this means the frame needs legs.

There are two basic designs of futon sofa beds: bi-fold and tri-fold. In the bifold, the length of the futon is the width of the couch, and the back basically falls back horizontal to make the bed. This is good if you want the couch to be as wide as possible. We don't, so we're going for the trifold, in which the width of the couch is the width of the bed, and frame and futon are both kind of folded into three to make the couch. 

The back of the couch is made up of two of the parts, in a kind of A frame, with the other part sticking out to sit on. It looks something like the picture below.

So I started with some legs at the front, then the legs of the back part tucking underneath it, and some legs under the middle hinge, the one opening upwards. It seemed like a good idea to have a leg under this hinge, to stop the bed collapsing at that point. The other hinge opens downwards, so if there is an adequate stopper on it, once it opens to 180 degrees it won't go any further, even if you put weight on it. This all means that when the bed is open, there are three sets of legs along its length, one set at each end, and one a third of the way along. Not ideally balanced, but it should work. 

When it turns into a chair, the legs at the front of the chair are still active. The ones at the back are now sticking in from the back at around  horizontal, hopefully not getting in the way. The middle legs are sticking towards them, the back of the seat now being held off the ground by an extension of the middle span. 

But why not get rid of those two legs, and have the existing legs swing out of the way when it's bed time? Then there are less legs to worry about, it doesn't matter which way the hinges go since the whole of the frame is lying along the floor. Functionally, this is going to spend most of its time as a couch rather than a bed, so being able to clean under the bed is not a problem. 

Simple is best. As Antoine de Saint-Exupery said, "A designer knows he has achieved perfection not when there is nothing left to add, but when there is nothing left to take away." 

And yes, I could have just followed 
Bored Guy's excellent instructions here. Or bought something online for slightly higher cost. But actually it's the design part that I enjoy. 

In fact rather than making my traditional futon sofa bed, I may just design a few more. 
How to design a chair: ergonomic data from Cornell.

Tuesday, 19 March 2013

Different thermal aesthetics

The basic idea behind our house is that heat is insulated, so the temperature stays within a comfortable range throughout the year. A little can be added in the winter. A little could be taken away in the summer.

Japan is hot in the summer, and cold in the winter, so measures often need to be taken to both heat and cool. This is the case in many places. In the UK and northern climates, overheating is usually not a problem, but heating is needed for much of the year. In tropical climates, heating is never really needed, but the temperature is too high for much of the year.

So a number of different thermal aesthetics are possible.

One approach is to design for the summer, aim to reduce excessive temperatures, then provide extra heating available for the winter.

Another approach is to design for the winter, aim to keep temperatures high, then provide extra cooling for the winter.

Commonly in Japan, buildings are designed for spring and autumn, so heat needs to be added in the winter, and cooling needs to be provided for the summer.

Ideally, a building should be designed for the whole year, so that it will not get too hot in the summer, and not get too cold in the winter. This is possible, but needs thermal insulation and thermal mass. Insulation and thermal mass both cost money, and calculations of the cost and benefit seem to be highly skewed against high capital costs and towards high running costs. In fact calculations are usually not even made, and capital costs are kept as low as possible without even considering running costs.

Heaters in Japan are often portable kerosene stoves, which can be moved into place and cleared away when the seasons change. Heating is not part of the building itself, but something that can be added later. This makes the buildings much more simple. Since the fuel is kerosene, filled from a tank, there is no need for fuel lines into the building. Just electric cables to pump in fuel and keep the fans running. This approach can lead to much lower fuel consumption, if heat is just provided where and when it is needed. Although fuel efficiency in modern western buildings is much higher, fuel consumption can also be much higher since the whole building is kept at a high temperature the whole time, while there may only be a couple of people in one or two rooms some of the time.

The traditional wisdom in Japan is that windows can be opened in the summer. As everyone knows, or soon finds out, opening windows doesn't work when it's in the thirties outside. Especially with some of the modern building techniques and their emphasis on cosmetics and cost cutting. So air conditioners are usually also installed.

The air conditioner is an effective device in the scenario of low-cost high-turnover buildings. They are usually wall or ceiling mounted so they take up little or no floor space. As a heat pump, they can cool buildings in the winter as well as heating them in the summer. In addition they can remove humidity from the air. This seems to me to be an example where the electronics industry is making up for deficiencies in the building industry. 

Friday, 25 January 2013

On design

Everyone has an idea of what is good design and what is bad design. Each person's ideas are different. They are usually not articulated, and we just have strong but unclear ideas of what we like and what we don't. We pick up on one detail or another, either turning us on or off, and we are ambivalent towards wide ranges of factors. 

For many people, energy efficiency and environmental impact fall into that blind spot that doesn't make the slightest difference to their stylistic appraisal of a product. 

In building our house, inevitably my wife and I did not have the same ideas, and the architect's ideas were different to both of ours.

Here's a list of things that I think I believe are criteria for good design. As I said our ideas about design come more from the gut than the mind, and even if they are from the mind, they're from the bit that doesn't do rational thought or logical organisation. Or lists of criteria. So these are criteria that I think I should be using to decide what is good design.

Simple

Sympathetic

Worth what you pay

Uses what you've got

Uses as little as possible

Doesn't need much looking after

Disobeys rules if there is a good reason to do so


They're ordered more on aesthetics than in order of priority, but the number, seven, was not chosen for it's luck. This is an exhaustive list. That's as many things as I could think of, although there may be some criteria that I've forgotten. 

Friday, 3 June 2011

All in a day's work

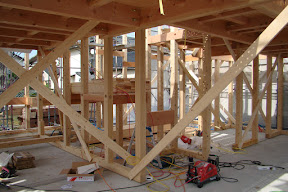
Yesterday there was blue tarp, filled with puddles, and today it looks like a house.

When I got there a little after 8am, most of the pillars for the first floor were in place. When they knocked off a little before six, they had reached the roof. Tomorrow they should get the rafters and the bottom of the roof on, and it will be ready for the solar panels, which arrive on Tuesday.


It's impressive what seven men with tabi on their feet and tools belts around their waists can do with a crane and seven truckloads of wood. 

The wood was all ready cut and in many places it looked like a giant puzzle that had been set for the carpenters by the architect, who was standing watching from the edge of the site for a lot of the time.

It's amazing how quickly this has turned from a stagnant pool of concrete into something that really resembles the house that we've been planning for the past two years. It's a bit like a sumo bout where they spend half an hour position themselves and eyeing each other up, then the action is over in about three seconds.


Yesterday I was looking at puddles in tarpaulin, and today I was walking around upstairs. A link has finally been made between the building in my head and a solid and substantial house we can live in!